Expert Tips for Easy Wall Sconce Installation
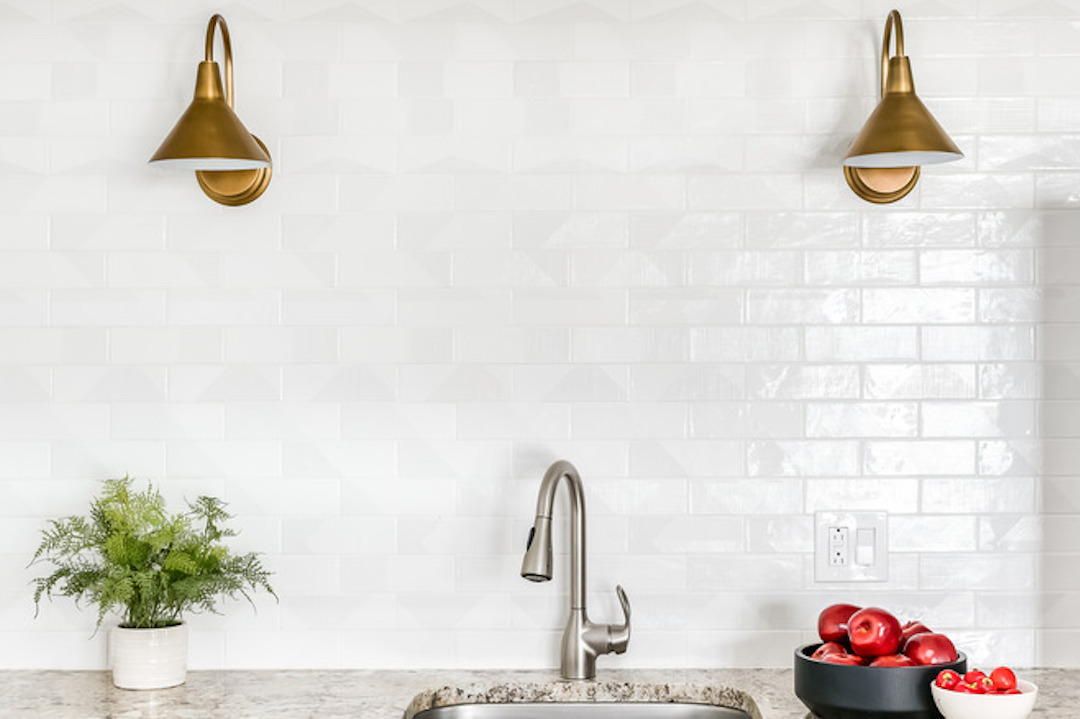
Selecting the ideal location for wall sconces is a critical step in enhancing the aesthetic and functional aspects of a room. The placement of these fixtures can dramatically influence the ambiance, making it essential to consider both the practical and decorative elements. One of the primary considerations is the height at which the sconces will be installed.
Generally, wall sconces should be mounted at eye level, which typically ranges from 60 to 72 inches from the floor. This height ensures that the light is effective without being blinding, creating a warm and inviting atmosphere. In addition to height, the location should also take into account the purpose of the sconces.
For instance, if they are intended to provide ambient lighting Potlamp in a living room, placing them on either side of a fireplace or artwork can create a focal point that draws the eye. Conversely, if the sconces are meant for task lighting, such as in a reading nook or beside a bed, they should be positioned closer to seating areas or bedside tables. Furthermore, considering the overall layout of the room is crucial; sconces should complement existing furniture and architectural features rather than compete with them.
This thoughtful approach to placement can transform a space, adding depth and character.
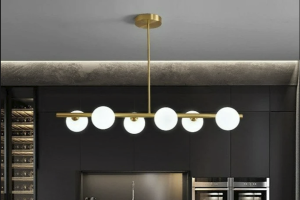
Selecting the Proper Type of Wall Sconce for Your Space
The variety of wall sconces available on the market today allows homeowners to choose fixtures that not only illuminate but also enhance their interior design. When selecting the right type of wall sconce, it is essential to consider both style and functionality. For example, if you are aiming for a modern aesthetic, sleek metal sconces with clean lines may be appropriate.
On the other hand, if your decor leans more towards traditional or vintage styles, ornate sconces with intricate detailing and warm finishes can add a touch of elegance. Another important factor in choosing wall sconces is the type of lighting they provide. Wall sconces can be categorized into several types based on their lighting direction: uplighting, downlighting, or multi-directional.
Uplighting sconces direct light upwards, creating a soft glow that enhances ceilings and adds height to a room. Downlighting fixtures focus light downward, making them ideal for task-oriented spaces like kitchens or reading areas. Multi-directional sconces offer versatility by allowing light to be directed in various ways, making them suitable for dynamic spaces where lighting needs may change frequently.
By carefully considering both style and lighting direction, you can select sconces that not only fit your design vision but also serve practical purposes.
Preparing Your Wall for Sconce Installation
Before diving into the installation process, it is crucial to prepare your wall adequately to ensure a successful outcome. This preparation begins with assessing the wall surface where the sconces will be mounted. Different wall materials—such as drywall, plaster, or brick—require different approaches for installation.
For instance, drywall is relatively easy to work with; however, it may require anchors to support heavier fixtures. In contrast, brick walls may necessitate specialized tools like masonry drills and anchors designed for brick to ensure a secure fit. Once you have determined the wall type and gathered the necessary tools and materials, it’s time to mark the installation points accurately.
Using a level and measuring tape, mark where each sconce will be placed based on your earlier decisions regarding height and spacing. It’s advisable to use a pencil for marking so that any mistakes can be easily corrected. Additionally, consider using painter’s tape to outline where the sconce will sit; this visual aid can help you better envision how the fixtures will look once installed.
Taking these preparatory steps not only streamlines the installation process but also minimizes potential errors that could lead to uneven or misaligned sconces.
Ensuring Proper Wiring for Your Wall Sconces
Wiring is a fundamental aspect of wall sconce installation that requires careful attention to detail and adherence to safety standards. Before beginning any electrical work, it is essential to turn off power at the circuit breaker to prevent any risk of electric shock. Once power is off, you can assess existing wiring in your walls.
If you are replacing old sconces, you may find existing wiring that can be reused; however, if you are installing new fixtures in an area without pre-existing wiring, you will need to run new electrical lines. When running new wiring, it’s important to follow local building codes and regulations. This often involves using appropriate gauge wire—typically 14-gauge for standard lighting circuits—and ensuring that all connections are secure and insulated with wire nuts.
If you are unsure about any aspect of wiring, consulting with a licensed electrician is highly recommended. They can provide guidance on proper techniques and ensure that your installation meets safety standards. Proper wiring not only ensures functionality but also contributes to the longevity of your wall sconces.
Installing Your Wall Sconces Safely and Securely
With your wall prepared and wiring in place, you can now proceed with the actual installation of your wall sconces. Begin by attaching the mounting bracket that comes with your sconce to the wall at the marked location using screws appropriate for your wall type. It’s crucial to ensure that this bracket is level; an unlevel sconce can detract from its visual appeal and may even affect its functionality.
Once the mounting bracket is securely in place, connect the wiring from your wall to the sconce according to the manufacturer’s instructions. Typically, this involves connecting black wires (hot) together and white wires (neutral) together while securing them with wire nuts. If your sconce has a ground wire (usually green or bare copper), it should be connected to the grounding screw on the mounting bracket or directly to the electrical box if applicable.
After making these connections, carefully tuck the wires back into the electrical box and attach the sconce to the mounting bracket. Finally, secure any decorative elements or shades as per your fixture’s design specifications before restoring power at the circuit breaker.
Adding the Finishing Touches to Your Wall Sconces
Once your wall sconces are installed and powered on, it’s time to focus on those finishing touches that will elevate their appearance and functionality.
Bulb Selection: Brightness and Ambiance
The type of bulb can significantly affect both brightness and color temperature. For instance, warm white bulbs create a cozy atmosphere ideal for living spaces, while cooler white bulbs may be more suitable for task-oriented areas like kitchens or home offices.
Dimming and Diffusion: Versatility and Aesthetics
In addition to bulb selection, consider incorporating dimmer switches into your lighting setup. Dimmers allow you to adjust brightness levels according to mood or activity, providing versatility in how you use your sconces throughout different times of day or occasions. Furthermore, decorative elements such as shades or glass covers can enhance both aesthetics and light diffusion; choosing materials that complement your overall decor will create a cohesive look throughout your space.
Maintenance: Preserving Appearance and Functionality
Finally, don’t overlook maintenance as part of your finishing touches. Regularly dusting your sconces and checking for any loose connections will help maintain their appearance and functionality over time. By taking these additional steps after installation, you ensure that your wall sconces not only serve their purpose effectively but also remain an attractive feature in your home for years to come.