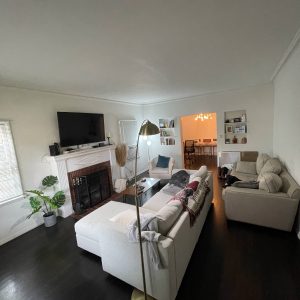
How to Create Your Own Stunning Lampshade with a DIY Kit
Lampshades are a great way to bring life and personality to any room. A DIY lampshade kit is an excellent option for those who want to have a unique, one-of-a-kind piece that matches their style and decor. With a little bit of creativity and some basic DIY skills, you can easily create your own stunning lampshade. In this article, we will go through a step-by-step guide on how to create your own lampshade with a DIY kit.
Step 1: Choose Your DIY Lampshade Kit
The first step is to choose a DIY lampshade kit that fits your needs and preferences. There are several types of lampshade kits available in the market, ranging from drum-shaped to conical-shaped to square-shaped to oval-shaped. Choose the kit that best matches your lamp base and your room decor.
Some popular DIY lampshade kits include:
- Chinese paper lampshade kit
- Ikea Lampshade kit
- Rattan lampshade kit
- Silk lampshade kit
Step 2: Gathering the Materials
Once you have chosen your DIY lampshade kit, it’s time to gather the materials you will need to make your lampshade. Although the materials may differ depending on the type of lampshade kit you have, some basic materials you will need include:
- Scissors
- A ruler
- A pencil
- A sharp craft knife
- A cutting mat
- Glue
- A lampshade frame
- A lampshade fabric
Step 3: Preparing the Lampshade Fabric
The next step is to prepare the lampshade fabric. You can use a pre-printed fabric or customize your lampshade fabric with your own design. Start by measuring the length and width of the lampshade frame and add an extra inch to each measurement for the seams.
Here is how you can prepare your lampshade fabric:
- Trim your lampshade fabric to the appropriate size.
- Iron the fabric if needed, so there are no wrinkles.
- Use a pencil to mark the seam allowance on the fabric, 1 inch from the shorter edges and 1/2 inch from the longer edges.
- Use a ruler to help you fold the seam allowance under and press it with your fingers.
- Use a small amount of glue to hold the seam in place.
Step 4: Attaching the Lampshade Fabric to the Frame
Once the lampshade fabric is prepared, it’s time to attach it to the frame. Remember to take your time and make sure the fabric is properly aligned and snugly fit.
Here are the steps to attach the fabric to the frame:
- Apply glue to the top and one side of the lampshade frame.
- Align the fabric over the glue and press it down using your fingers.
- Trim any excess fabric from the edge and carefully fold the fabric over the frame’s edge.
- Use glue to attach the remaining fabric to the other side of the frame.
- Repeat this process until all sides of the lampshade are covered with the fabric and the fabric is secured in place.
Step 5: Final Touches
The last step is to add some final touches to your lampshade. You can add trims, tassels, or other embellishments to make it more unique and personalized. The final touches depend on your personal style and the type of lampshade kit that you choose.
Here are some final touches that you can add to your lampshade:
- Ribbon trim
- Beaded fringe
- Lace braid
- Silk tassels
Creating your own lampshade using a DIY kit is not only cost-effective but also allows you to showcase your creativity and design skills. With a little bit of patience, you can create a stunning lampshade that cohesively blends with your room decor. So don’t wait any longer, choose a DIY lampshade kit, and start creating your own unique lampshade today!


